Inviting Teachers to Your School
Add individual teachers or upload bulk invitations via CSV to get your whole school on ReportRocket. Manage pending invitations and resend links.
Adding Teachers to Your School Licence
Your school licence covers all teachers you invite. Here's how to get your team on board.
Individual Invitations
Step-by-Step
- Go to School Admin > Invitations
- Click "Invite Teacher"
- Enter their email address
- Optionally enter their name
- Choose a role — Teacher (default) or Reviewer
- Click "Send Invitation"
What Happens Next
- ReportRocket creates the teacher's account instantly — no waiting for them to sign up
- The teacher receives a "Set Your Password" email
- Once they set their password, the invitation is automatically marked as accepted
- They can start using ReportRocket straight away under your school licence
- You can begin uploading classes for them immediately, even before they set their password
Bulk Invitations
For schools with many teachers, use bulk upload.
Prepare Your CSV
Create a CSV file with teacher details. You can also download a template from the Bulk Import dialog.
email,name,role
teacher1@school.edu.au,Jane Smith,teacher
teacher2@school.edu.au,John Doe,reviewer
teacher3@school.edu.au,Sarah Lee,teacher- email (required) — the teacher's email address
- name (optional) — their full name
- role (optional) —
teacher(default) orreviewer
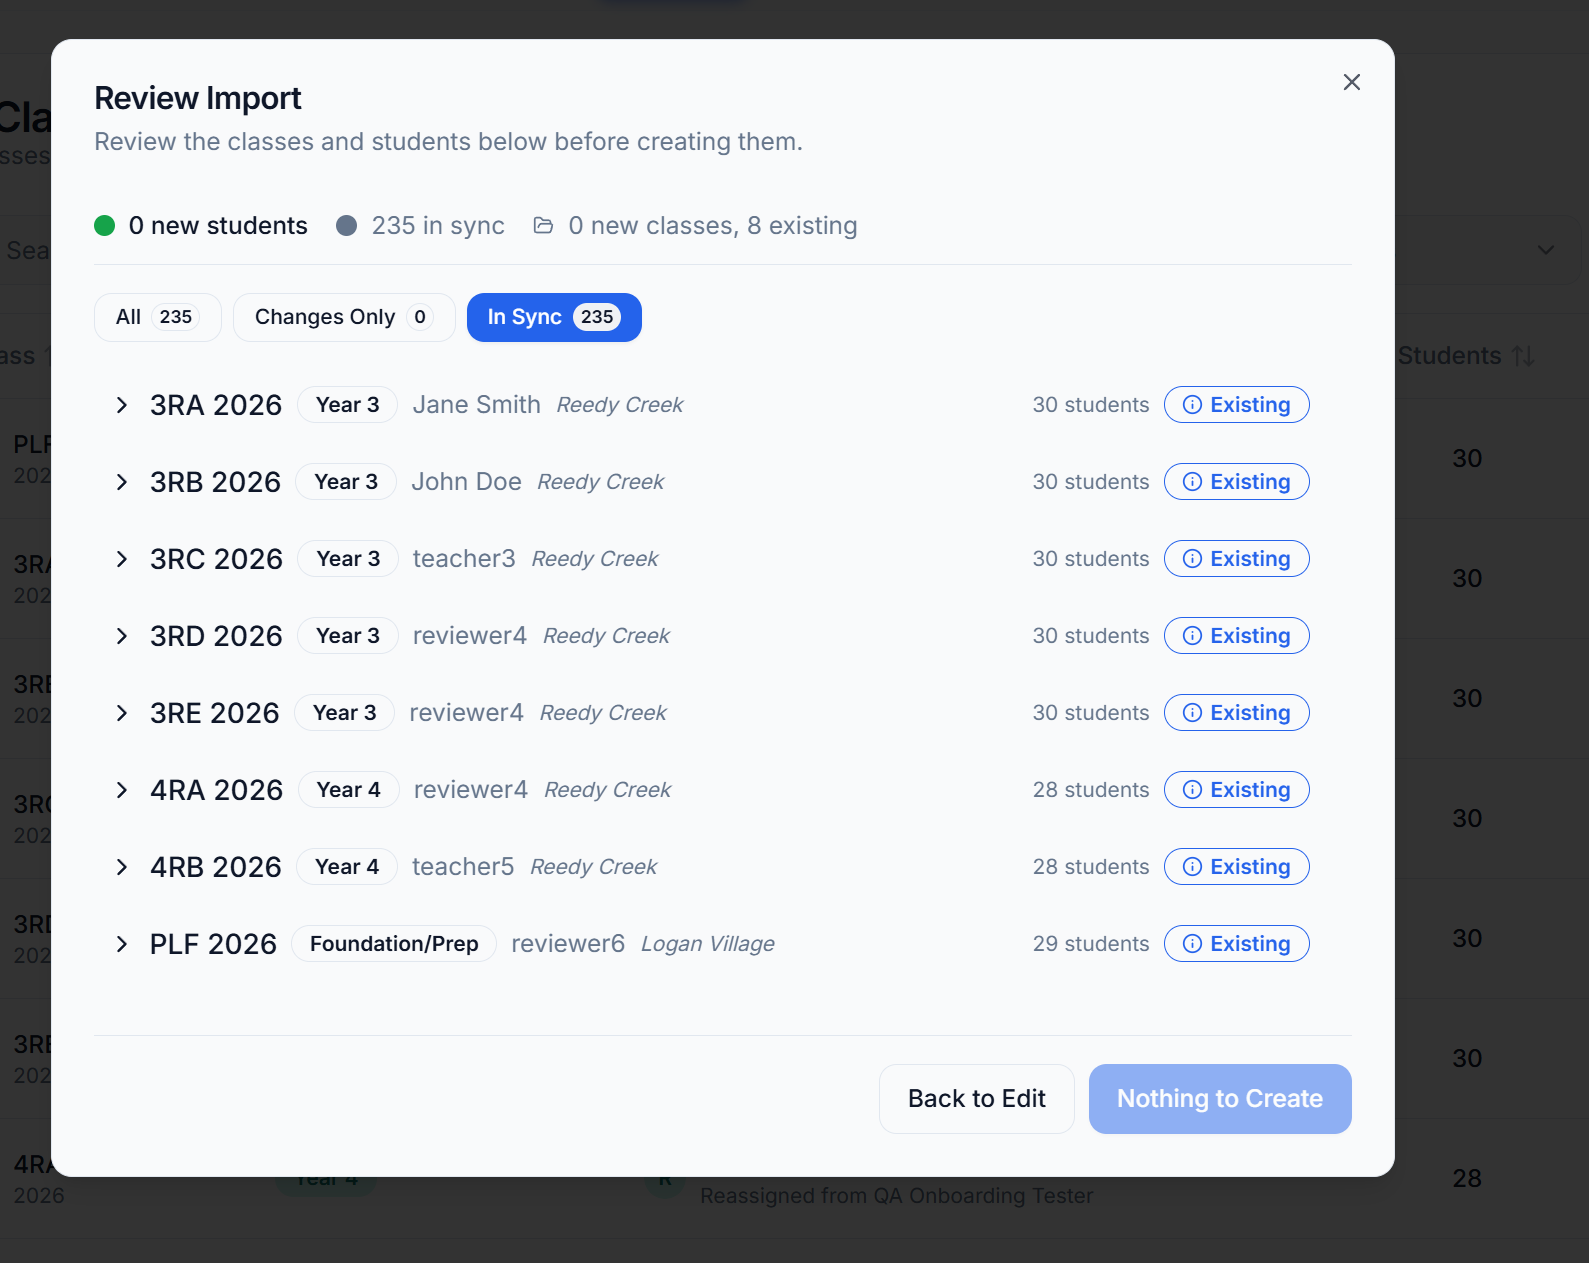
Upload Process
- Go to School Admin > Invitations
- Click "Bulk Import"
- Choose "Upload File" and select your CSV or Excel file, or paste directly from a spreadsheet
- Review the preview — check names, roles, and catch any errors
- Confirm to send all invitations
Handling Errors
The preview shows any issues:
- Invalid email formats
- Duplicate entries
- Teachers already in your school
- Teachers belonging to another school
Remove invalid rows and proceed with the valid ones.
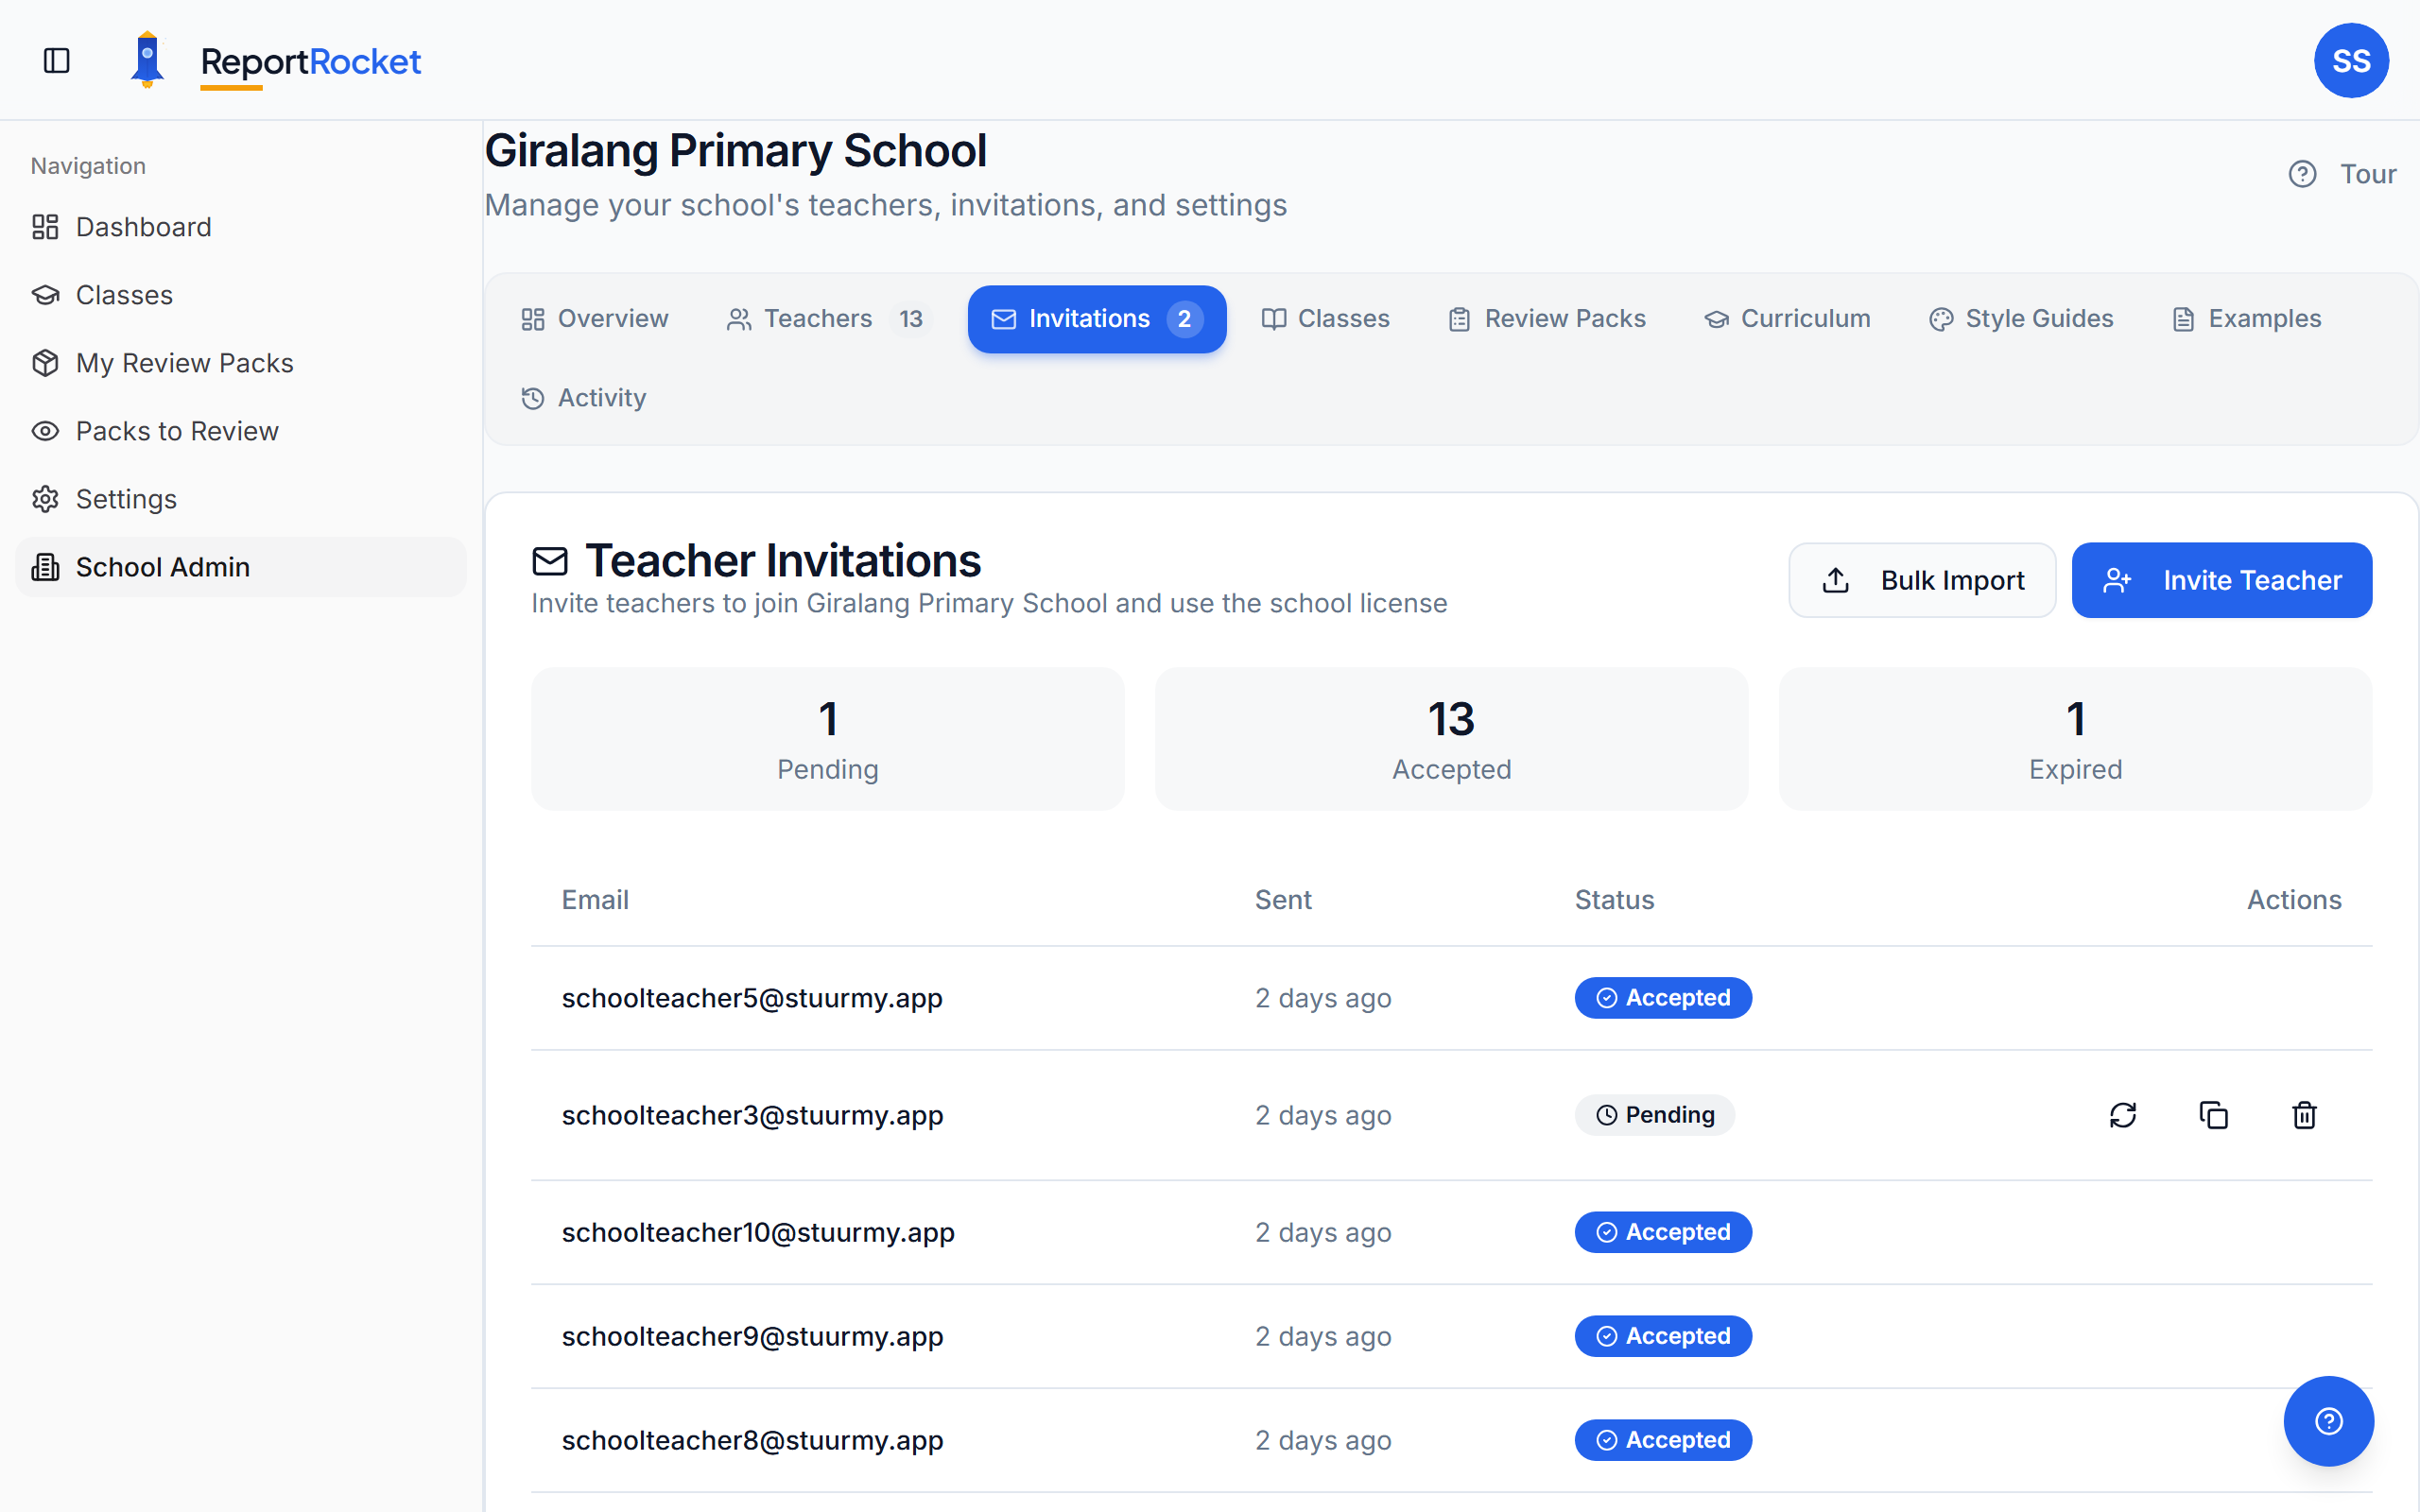
Managing Pending Invitations
View Pending
See all invitations awaiting acceptance under the Invitations tab. An invitation shows as "Pending" until the teacher sets their password and logs in for the first time.
Actions
Each pending invitation has icon buttons for quick actions:
- Resend — sends a fresh "Set Your Password" email if the teacher hasn't received theirs
- Copy invitation link — copies the setup link to your clipboard so you can share it directly (e.g. via staff chat or in person)
- Revoke — cancels the invitation and invalidates the link
Resend
If a teacher hasn't received their email:
- Find them in the pending list
- Click the Resend icon button
- They'll receive a new "Set Your Password" email with a fresh link
Cancel
No longer need to invite someone?
- Find them in the pending list
- Click the Revoke icon button
- The invitation link becomes invalid
Invitation Expiry
Password setup links expire after 24 hours for security. Simply resend if the teacher needs a new link.
Assigning Roles
You can set a teacher's role at invite time — choose Teacher or Reviewer when sending the invitation. If you need to change it later:
- Go to School Admin > Teachers
- Find the teacher
- Click the three-dot menu
- Select Make Reviewer or Make Admin
See Managing roles and permissions for full details on the role hierarchy.
Capacity Limits
Your licence tier determines how many students can be tracked. Adding more teachers doesn't affect this limit. Only student count matters.
Next Steps
Was this article helpful?